home coolshots info articles feedback

 coolthaihouse.com -> coolshots -> windows & doors 

August 2004 - editor.  The chronology of a sample building project in Pattaya, Thailand.  Window and door installation.

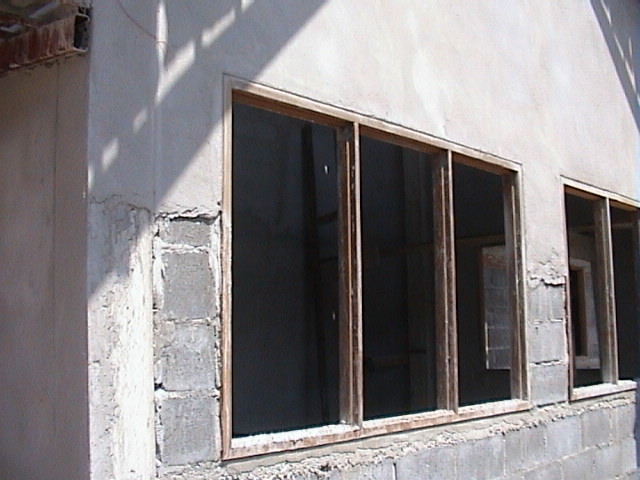
There were a few different groups involved with the windows and doors.  The regular crew did the framing.  A skilled window and door craftsman installed the windows and doors.  A metal company did the glass, security metal and screens.  Another metal company did the front screen door.  And finally, a curtain company installed the curtains.

Two windows framed.  There is a 'leveled' cement base below the window frame and bricks are being used to level the wall to be even with the top of the frame.  (13-Mar-04)

Front door of house framed.  There is a cement base above the door frame.  (22-Mar-04)
Starting to frame a bedroom door.  A piece of 2 * 4 is used to keep the door in place.
These window frames show the how a cement base is placed above and below the window frame, and how the red bricks are used to level out the wall above the window.  (28-Mar-04)
Bathroom door being framed.  This was a repair job.
Bathroom window framed.  Notice the cement base below the window and the use of red brick above.
Rear door framed and the side design of clear blocks.  This side of clear blocks turned out to be poor placement, as when the door is open it blocks the light.
Rear door being repaired.  The first time the door was framed without using anchor nails and had to be redone.  It is in the process of be reframed.  (02-Apr-04)
An embedded anchor nail.  These nails are put in the door frame at regular intervals (about 15 centimeters apart) and used to anchor the frame to the wall.
This shows a repair job on the clear glass bricks installed in the large bathroom.  The first go round there was not any cement used between the bricks.  (09-Apr-04)
This shows the frame after stucco has been partially applied.  (17-Apr-04)
A close up of a clear block.  There is one centimeter of cement used between the blocks.  (21-Apr-04)
This cabinet door shows the use of anchor nails.  Anchor nails are inserted at about 10 centimeter intervals and will be used as a strengthening anchor to the frame of the surrounding wall surface.  (13-May-04)
The windows being prepared for the top and bottom hinges.  (18-Jun-04)
A close up of the top and bottom sliding hinge used throughout.  I think these look better than the side mounted hinges.  (19-Jun-04)
Attaching a window to the frame.
Fitting a door in place.  (22-Jun-04)
A mounted inside solid wood door prior to being varnished.
Painting a frame.  The frames are all painted oak color, where the windows and doors were varnished.
Heavy duty hinge on an indoor door.  (23-Jun-04)
Installing a hinge on the front door.  (24-Jun-04)
The front door lockset was installed upside down.  It is amazing how many different things which go into a house can actually be installed backwards or upside down.  (25-Jun-04)
Here is the door lock in the process of being corrected.
This was tough to get installed because it is not the typical 'low quality' lockset and the door installer hadn't done one like this before.  Notice the plug used to fix the holes caused during the previous 'wrong way' installation.  (26-Jun-04)
The glass needed to be cut for the grate windows with a glass cutter.  (27-Jun-04)
These type of windows are used in the kitchen, rear of the house and adjacent to the parking lot.
All of the wood windows have an opening mechanism as pictured here.  The window can be opened and closed without having to open the screen.  The window is opened by pushing the rod, and closed by pulling it.  There is also a locking mechanism on the top of the windows (not shown) which allows the windows to be locked without opening the screen.
The wood windows after a couple of coats of varnish.  (27-Jun-04)
This shows the grate windows opening mechanism.  (28-Jun-04)
This window is being prepped to have glass installed.  The front wood needs to be removed and then reaffixed after the glass is inserted. (02-Jul-04)
The glass installer re-attaching the front retaining wood after the tinted window glass has been installed.
The final step is to caulk around each window piece installed. 
Screens and metal security grates being installed.  (08-Jul-04)
The automatic door closer on the front screen door was installed upside down, and this by a person who says he has installed hundreds all the same way.  Notice how he had to use a special metal block to secure the opener, above the door.  (14-Jul-04)
Here he is fixing the installation.  The opener goes on the door itself, the arm attaches to the frame.
Curtain installation.  (29-Jul-04)
Finished front door.  (19-Aug-04)
Wood windows in front of house.
Metal door holders, as used throughout.  These solid door holders use a ball bearing to lock in place.  (20-Aug-04)
 
Feedback plea This site is free, but needs your comments and corrections to make it a valuable resource. If you've got comments, corrections or other information please leave feedback here.

home | coolshots home | bathrooms | ceiling | concretepour | electrical | eves | finishedhouse | foundationcolumn | gate | 
gutter
 | hindsight | kitchen | perimeterwall | planterbox | readme | road | roof | shotoftheweek | tile | views | wall | water | windowdoor

This page was last updated October 2nd, 2009