|
 The
framed small bathroom. (13-Mar-04) The
framed small bathroom. (13-Mar-04)
|
|
|
 The
small bathroom with 4" PVC for the toilet. The
small bathroom with 4" PVC for the toilet. |
|
|
 A
septic being dug. (22-Apr-04) A
septic being dug. (22-Apr-04) |
|
|
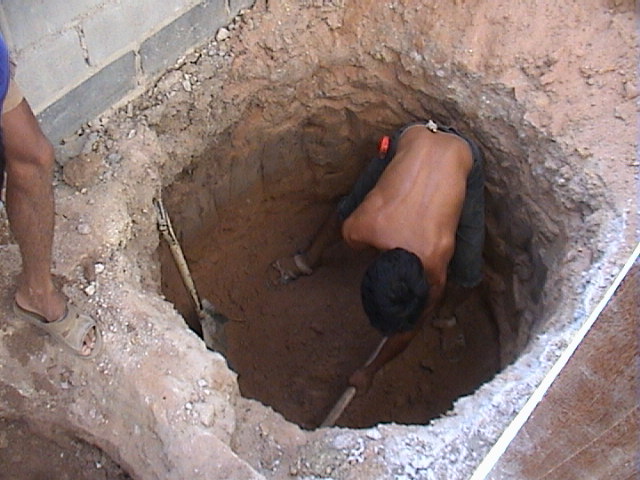
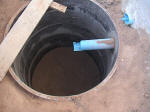 This
shows the toilet septic for the small bathroom.
In all there are 4 septic tanks, 2 for water
runoff and 2 for toilets. There are 5
cement rings used for each one, the standard
being 4. Each ring is 1.2 meters in
diameter. This
shows the toilet septic for the small bathroom.
In all there are 4 septic tanks, 2 for water
runoff and 2 for toilets. There are 5
cement rings used for each one, the standard
being 4. Each ring is 1.2 meters in
diameter. |
|
|
 The
row of septics is dug behind the house. There are
two groups of pairs of septics. From this side the
sequence would be toilet, water runoff, water runoff,
toilet. The
row of septics is dug behind the house. There are
two groups of pairs of septics. From this side the
sequence would be toilet, water runoff, water runoff,
toilet. |
|
|
 Here
is a cement ring is being put in place in one of
the septics. (23-Apr-04) Here
is a cement ring is being put in place in one of
the septics. (23-Apr-04) |
|
|
 The
4" PVC is run into the toilet septic. The mallet
is used to create the opening in the cement ring.
(31-May-04) The
4" PVC is run into the toilet septic. The mallet
is used to create the opening in the cement ring.
(31-May-04) |
|
|
 The
PVC drainage from the small bathroom for the
water runoff. There are 3 exhaust pipes
used for each bathroom. One is for the
bathtub (or shower stall), one is for the sink
and one is for the outside drain. The
pipes are secured in place with a heavy cement.
(01-Jun-04) The
PVC drainage from the small bathroom for the
water runoff. There are 3 exhaust pipes
used for each bathroom. One is for the
bathtub (or shower stall), one is for the sink
and one is for the outside drain. The
pipes are secured in place with a heavy cement.
(01-Jun-04) |
|
|
 The
hot water is run through copper enclosed in PVC pipe.
(02-Jun-04) The
hot water is run through copper enclosed in PVC pipe.
(02-Jun-04) |
|
|
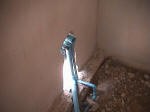
 This
is the raw plumbing in the small bathroom, shown
from the door opening counter clockwise.
This shot shows the outside drain pipe (3"
standing) along with the 2" sink runoff.
The other PVC is the entry of hot and cold
water. This
is the raw plumbing in the small bathroom, shown
from the door opening counter clockwise.
This shot shows the outside drain pipe (3"
standing) along with the 2" sink runoff.
The other PVC is the entry of hot and cold
water. |
|
|
 Small
bathroom hot and cold water for the shower stall. Small
bathroom hot and cold water for the shower stall. |
|
|
 Small
bathroom water entry for the toilet and bottom
washer. The 4" PVC is the toilet exhaust. Small
bathroom water entry for the toilet and bottom
washer. The 4" PVC is the toilet exhaust. |
|
|
 The
small bathroom sink plumbing, showing hot and cold water entry and water
runoff. The
small bathroom sink plumbing, showing hot and cold water entry and water
runoff.
|
|
|
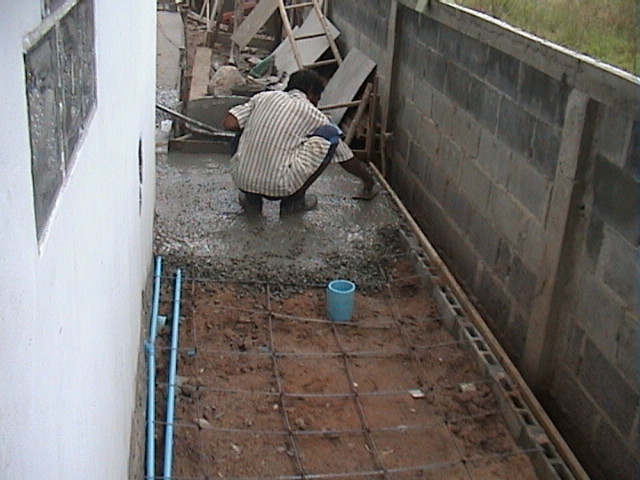
 The
small bathroom being prepared for a cement pour. Sand has been
leveled and the wire put in place. The bathroom will be
sloped to allow the runoff water to flow to the floor drain. The
small bathroom being prepared for a cement pour. Sand has been
leveled and the wire put in place. The bathroom will be
sloped to allow the runoff water to flow to the floor drain. |
|
|
 Small
bathroom after the cement pour. The 4" PVC on the left is the
toilet exhaust and the 3" on the right is the shower stall exhaust.
(03-Jun-04) Small
bathroom after the cement pour. The 4" PVC on the left is the
toilet exhaust and the 3" on the right is the shower stall exhaust.
(03-Jun-04) |
|
|
 Large
bathroom plumbing layout. On the left is the general water
runoff PVC. On the right is the water entry, bathtub
exhaust, toilet exhaust and finally the sink exhaust pipe. Large
bathroom plumbing layout. On the left is the general water
runoff PVC. On the right is the water entry, bathtub
exhaust, toilet exhaust and finally the sink exhaust pipe. |
|
|
 The
large bathroom sink plumbing showing hot and cold water entry and the
larger water exhaust pipe. The
large bathroom sink plumbing showing hot and cold water entry and the
larger water exhaust pipe. |
|
|
 Water
runoff pipes run into the septic like this. (05-Jun-04) Water
runoff pipes run into the septic like this. (05-Jun-04) |
|
|
 Large
bathroom after cement has just been poured. (05-Jun-04) Large
bathroom after cement has just been poured. (05-Jun-04) |
|
|
 Concrete
is poured over the hot and cold water pipes. Also note the
septic exhaust. (07-Jun-04) Concrete
is poured over the hot and cold water pipes. Also note the
septic exhaust. (07-Jun-04) |
|
|
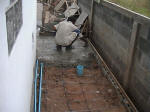
 Concrete
walkway in the rear being finished off, showing two septic exhausts.
Note also the metal brackets on the wall which are used as a support for
the water heater which is a wall mount and resides in the kitchen. Concrete
walkway in the rear being finished off, showing two septic exhausts.
Note also the metal brackets on the wall which are used as a support for
the water heater which is a wall mount and resides in the kitchen. |
|
|
 Large
bathroom after tiling is almost complete. The water runoff
drain is on the far left (near the bathtub area). The bathtub still needs to be
plumbed in. (12-Jun-04) Large
bathroom after tiling is almost complete. The water runoff
drain is on the far left (near the bathtub area). The bathtub still needs to be
plumbed in. (12-Jun-04) |
|
|
 The
plumber is applying tile grout. (14-Jun-04) The
plumber is applying tile grout. (14-Jun-04) |
|
|
 This
shows the base for the shower enclosure in the small bathroom.
Tile is being applied. (19-Jun-04) This
shows the base for the shower enclosure in the small bathroom.
Tile is being applied. (19-Jun-04) |
|
|
 Completed
and tiled shower enclosure base. (20-Jun-04) Completed
and tiled shower enclosure base. (20-Jun-04) |
|
|
 The
sink cabinet being formed in the small bathroom. The
cabinet is made from bricks. Note the metal on the right
which is used to add strength. Holes are drilled in the
wall and the metal is inserted prior to the final cement being
laid on top. The
sink cabinet being formed in the small bathroom. The
cabinet is made from bricks. Note the metal on the right
which is used to add strength. Holes are drilled in the
wall and the metal is inserted prior to the final cement being
laid on top. |
|
|
 Cabinet
in progress in the large bathroom. (21-Jun-04) Cabinet
in progress in the large bathroom. (21-Jun-04) |
|
|
 The
75 liter hot water heater which is mounted on the kitchen wall.
This feeds hot water throughout the house. The
75 liter hot water heater which is mounted on the kitchen wall.
This feeds hot water throughout the house. |
|
|
 The
large bathroom cabinet. The
large bathroom cabinet.
|
|
|
 The
bathtub will be supported by this brick enclosure. The
bathtub will be supported by this brick enclosure. |
|
|
 Partially
tiled sink enclosure in the small bathroom. (22-Jun-04) Partially
tiled sink enclosure in the small bathroom. (22-Jun-04) |
|
|
 The
top shows the heavy duty bathtub drain assembly which was
purchased separately for about 1700 Baht. On lower portion
shows the default drain assembly which comes with the bathtub.
You wouldn't want to use this plastic type. (23-Jun-04) The
top shows the heavy duty bathtub drain assembly which was
purchased separately for about 1700 Baht. On lower portion
shows the default drain assembly which comes with the bathtub.
You wouldn't want to use this plastic type. (23-Jun-04) |
|
|
 The
plumber finishing off the shower enclosure. The
plumber finishing off the shower enclosure. |
|
|
 This
is a critical piece of plumbing which is used under the bathtub.
Without it, for one thing, foul smells can flow in through the
bathtub from the water septic. (24-Jun-04) This
is a critical piece of plumbing which is used under the bathtub.
Without it, for one thing, foul smells can flow in through the
bathtub from the water septic. (24-Jun-04) |
|
|
 Heavy
duty drainage assembly being attached to the bathtub. Note; this
is a heavy duty acrylic bathtub. Heavy
duty drainage assembly being attached to the bathtub. Note; this
is a heavy duty acrylic bathtub. |
|
|
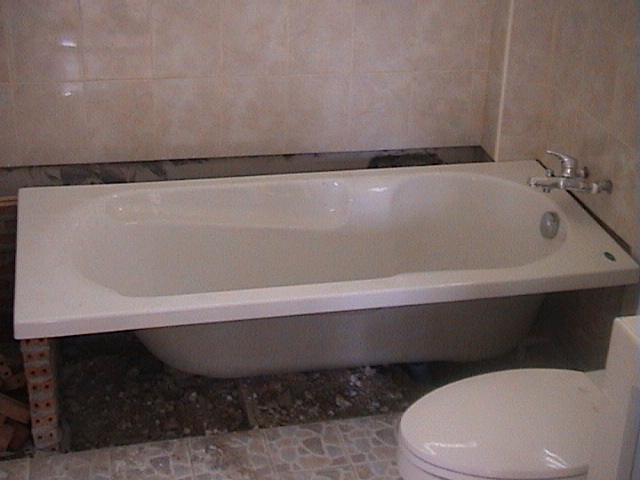
 Bathtub
in the process of being framed. The bathtub is being sized
here. After this two more rows of supporting bricks were
added, for a total of 4 supporting rows. (25-Jun-04) Bathtub
in the process of being framed. The bathtub is being sized
here. After this two more rows of supporting bricks were
added, for a total of 4 supporting rows. (25-Jun-04) |
|
|
 Bathtub
tiled in. (27-Jun-04) Bathtub
tiled in. (27-Jun-04) |
|
|
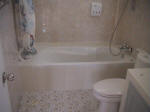
 Completed
small bathroom, toilet and shower enclosure. (06-Jul-04) Completed
small bathroom, toilet and shower enclosure. (06-Jul-04) |
|
|
 Small
bathroom sink. Small
bathroom sink. |
|
|
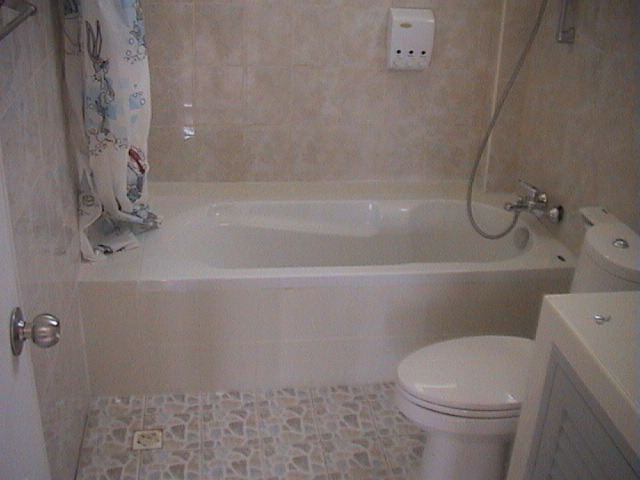
 Large
bathroom bathtub and toilet. Large
bathroom bathtub and toilet. |
|
|
 Large
bathroom sink. This is one of those minor annoyances. This
sink was placed a little too near the wall which means
one needs to bend forward to use it. Large
bathroom sink. This is one of those minor annoyances. This
sink was placed a little too near the wall which means
one needs to bend forward to use it. |
|
|
 Prep
work for the septic exhaust cover.
(08-Jul-04) Prep
work for the septic exhaust cover.
(08-Jul-04) |
|
|
 Stainless
septic exhaust cover installed. (09-Jul-04) Stainless
septic exhaust cover installed. (09-Jul-04) |
|
|
 Each
of the septics are vented off to the rear as
shown here. (21-Aug-04) Each
of the septics are vented off to the rear as
shown here. (21-Aug-04) |
|
|
 |
|